What Is 35-ds3chipdus3 And How To Install It? [Explained]
![]() By Ankita Tripathy
27 February, 2026
Security
By Ankita Tripathy
27 February, 2026
Security
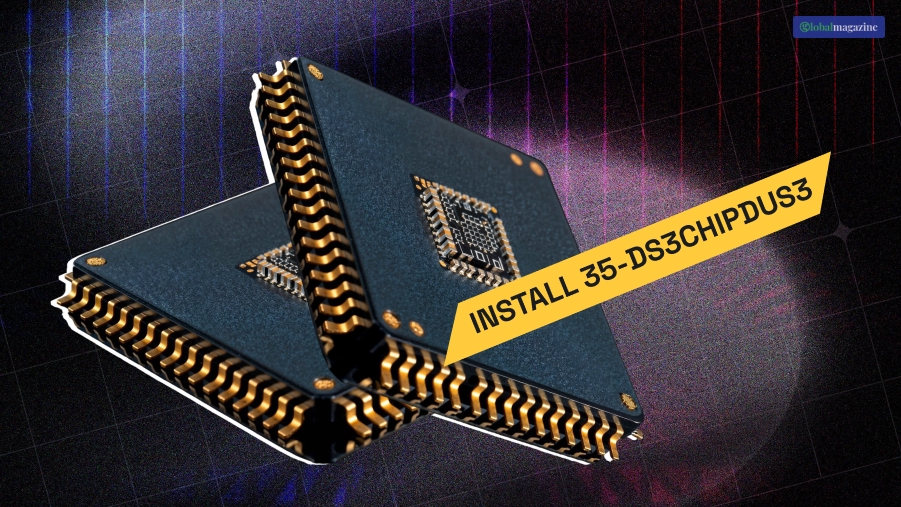
35-ds3chipdus3 packs a lot of power into a tiny frame. Now comes the real challenge: getting it out of that antistatic bag and into your system without messing anything up. So, how to install 35-ds3chipdus3?
Honestly, it feels a bit like performing surgery. There’s so much advice out there, and it can get overwhelming fast.
The first time I tried this, my hands were shaking. I kept picturing myself zapping the chip or accidentally bending a pin. But after a few tries, I realized anyone can do this if they take their time and stay focused.
I put together this guide to walk you through each step, from understanding what the chip actually does, right up to the final checks to make sure you nailed the install.
So, if you want to know how to install 35-ds3chipdus3, keep reading!
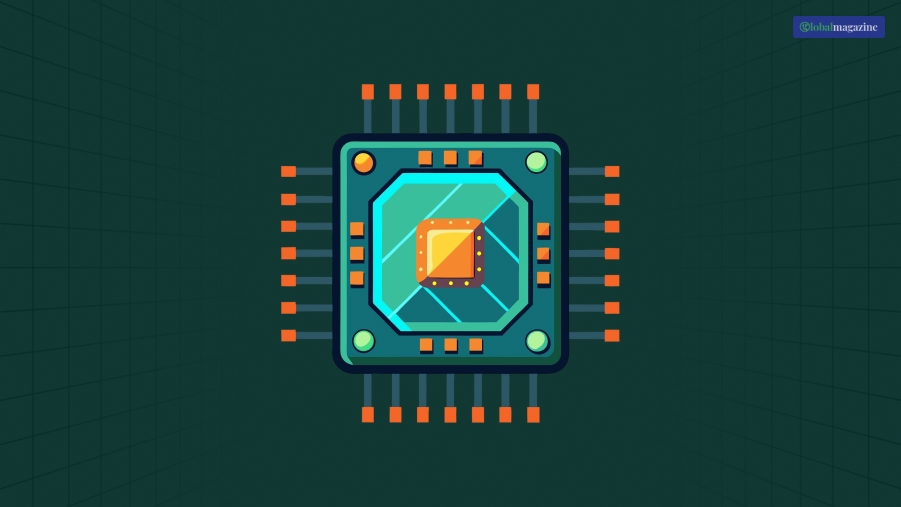
What Is 35-ds3chipdus3?
Before I explain how to install 35-ds3chipdus3, let’s talk about the chip first!
The 35-ds3chipdus3 cranks up the processing speed in modern electronics. It’s small, but it packs a punch – users notice smoother performance, faster multitasking, and lower power bills.
A lot of people grab it to breathe new life into older systems instead of jumping straight to an upgrade.
Thanks to its compact size, you can fit it into all kinds of devices. It keeps new apps and heavy-duty tasks running without a hitch.
Additionally, if your computer feels sluggish, learning to install the 35-ds3chipdus3 gives it a noticeable boost.
At its core, this chip acts like a digital traffic controller, managing all the data moving around inside your device.
Furthermore, it handles the flow between the processor, memory, and all your peripherals, making sure signals get where they need to go – fast and without mistakes.
If you work with big files – maybe you’re gaming, editing video, or running IoT setups – data transfer can slow everything down. This chip was built to cut through those slowdowns and keep your system running at its best.
Purpose Of 35-ds3chipdus3
DS3 Technologies Inc. built this product to cover a lot of ground – you can use it in embedded systems, or even turn it into the heart of a single-board computer desktop.
The main idea or purpose? It sharpens up your communications protocols and keeps your signal clean, which matters more and more as processors get faster.
If your signal gets shaky, you’re asking for trouble. Think corrupted data, random crashes, or your system suddenly slowing down. When you install the 35-ds3chipdus3, you’re not just plugging in another component.
You’re giving your system a solid backbone for communication. That means real perks: quicker boot times, less lag, and steady performance even when things get busy.
It’s not just about making your machine faster – it’s about making sure everything works together the way it should.
Why Install 35-ds3chipdus3?
Putting in this chip does a lot more than just speeding up your device. Sure, things load faster, but that’s just the start.
Your device lasts longer, runs cooler, and you end up saving money. No wonder so many people want to know how to install the 35-ds3chipdus3 right now.
Here are some of the reasons why you should install 35-ds3chipdus3:
- You get a serious jump in processing speed.
- It fits with tons of different devices.
- You can run the latest software without any hiccups.
- It costs way less than swapping out your whole system.
- It uses less energy.
Now that you know the reason behind installing 35-ds3chipdus3, let’s head over to installing the chip, shall we?
Things To Do Before Installing 35-ds3chipdus3
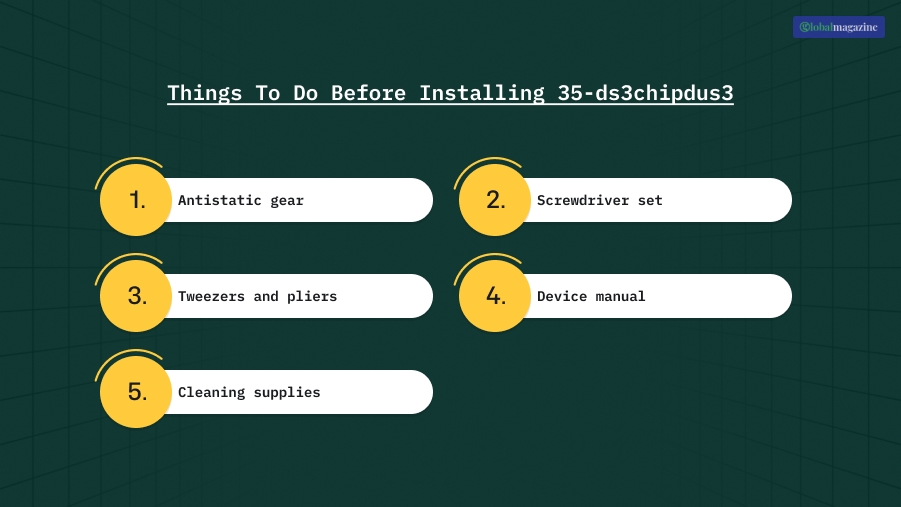
Before you even touch the chip, take a minute to get things set up right. A little prep goes a long way – skip it, and you could end up frying the whole thing before you even get started.
Start with your workspace. Make sure it’s clean and organized and keep static electricity far away.
Static is sneaky – you won’t feel it, but it can wreck sensitive parts like the 35-ds3chipdus3 in a split second.
Once your space is ready, grab everything you’ll need, so you’re not hunting for tools halfway through.
Here’s what you should have on hand:
- Antistatic gear: A wrist strap is your best friend here. Clip it to a bare metal part of your computer case to ground yourself. An antistatic mat under your work area is even better.
- Screwdriver set: You’ll need both flathead and Phillips-head screwdrivers to open up the device.
- Tweezers and pliers: Go for non-conductive ones – plastic or ceramic-tipped tweezers are perfect for handling tiny screws or wires.
- Device manual: Don’t skip this. The manual shows you exactly where the chip goes.
- Cleaning supplies: Use a can of compressed air to clear out dust and have some isopropyl alcohol and lint-free cloths handy in case you need to clean any contacts.
Get all this together first, and you’ll be ready to install the chip without any surprises.
How To Install 35-ds3chipdus3: Step-By-Step Guide
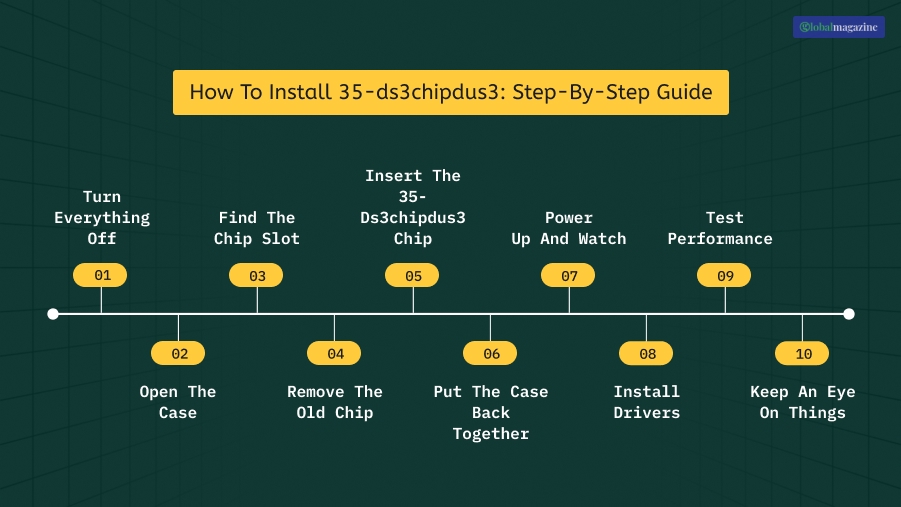
So, how to install 35-ds3chipdus3? Let’s walk through each stage, one by one, step-by-step. These steps matter a lot if you want to install the chip right – and not run into headaches later.
Here’s how to install 35-ds3chipdus3:
Step 1: Turn Everything Off
First of all, shut the system down completely. Unplug it. As we all know, it’s best to never mess with your device while it’s still connected to power.
Step 2: Open The Case
Secondly, grab a screwdriver and remove the screws. Drop them in a tray so they don’t roll away. Carefully lift off the cover and set it aside in a safe place.
Step 3: Find The Chip Slot
Thirdly, look for the chip slot – check your manual if you’re not sure. Usually, it’s close to the processor or the RAM.
Step 4: Remove The Old Chip
Undo any screws or clips holding the old chip in place. Gently lift it out. Don’t yank or use force near other parts.
Step 5: Insert The 35-ds3chipdus3 Chip
Line up the new chip with the slot. Slide it in until you hear a click or feel it settle. Secure it with screws or clips if needed.
Step 6: Put The Case Back Together
Replace the cover and tighten the screws. Double-check that everything’s secure, then reconnect all the cables.
Step 7: Power Up And Watch
Plug your device back in. Turn it on. Watch the startup – if it boots up smoothly, the chip’s working.
Step 8: Install Drivers
After you have switched it on and the power is back, head to the chip maker’s website. Then grab the latest drivers, install them, and reboot.
Step 9: Test Performance
Fire up a benchmarking tool like Geekbench or CPU-Z. Compare your new scores to the old ones – you should see a clear jump.
Step 10: Keep an Eye on Things
Finally, for the next few days, watch the temperature, performance, and fan noise. If you notice overheating or slowdowns, go back and check the installation.
Read Also: What Is Content://Cz.Mobilesoft.Appblock.Fileprovider/Cache/Blank.Html?
Real-World Benefits Of 35-ds3chipdus3 Chip
People who’ve tried the 35-ds3chipdus3 notice real improvements. Boot times speed up, multitasking feels smoother, and games run steady without all the crashes and hiccups.
You get support for more advanced apps, too, and the system stays cooler, even when you push it hard.
If your computer lags or just feels slow, this chip fixes it – and the best part is, you don’t have to swap out the whole motherboard or CPU. Just install it and get moving again.